Worklist- OPD
Upon successful “Login” , user will be directed to the “ Landing Page ”.
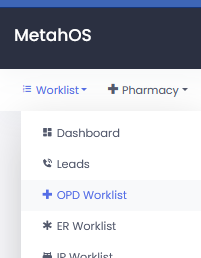
Click the "Worklist" module button on the landing page.

Choosing from a dropdown menu- "OPD Worklist"
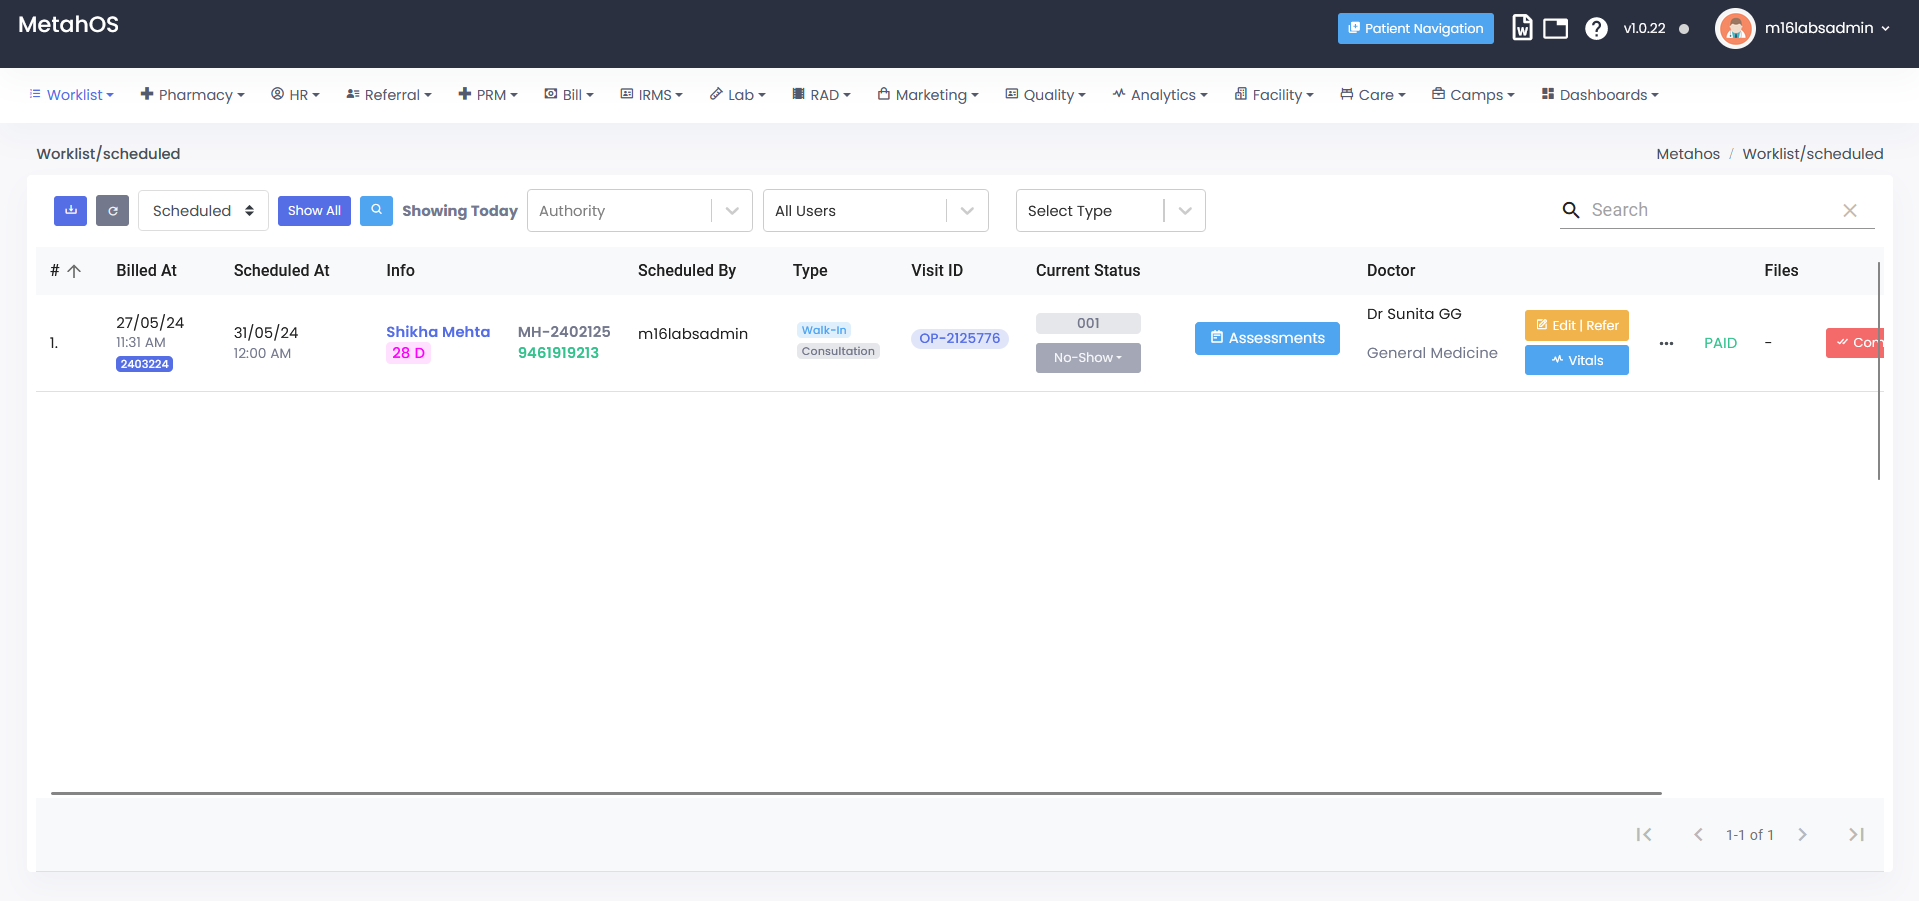
User will be landed on the OPD Worklist page.
-The OPD Worklist page offers a central location to view and manage your upcoming outpatient clinic appointments.
-The typical options available are:
- Download
- Refresh
- Status in OPD Worklist
- Authority
- Users
- Select Type
- Search Option
- Downloading the OPD Worklist
The Download button allows users to export the data displayed on the OPD Worklist page into a downloadable file. This can be useful for creating a backup a worklist, sharing it with colleagues, or using the data for further analysis in another program.
Steps:
-Locate the Download button on the OPD Worklist page. It is represented by a downward arrow icon.
-Click the Download button.
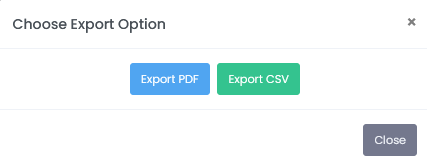
-On the software, user will see a pop-up window with options to choose the download format as Choose Export Option.


- User can choose a specific format (e.g., CSV, Excel) for creating a record of the worklist outside the software.
- CSV (Comma-Separated Values): A plain text file where data is separated by commas, suitable for importing into spreadsheet software like Microsoft Excel or Google Sheets.
- Excel (.xlsx): A formatted spreadsheet file compatible with Microsoft Excel.
Refresh the OPD Worklist
-Clicking the refresh button (a circular arrow symbol) reloads the worklist information from the system’s database. This ensures the most up-to-date data, especially after making changes or receiving new appointments.

Filtering Appointments by Status in OPD Worklist
-Steps:Locate the filter on the OPD Worklist page.
Click on the dropdown menu to view the available filter options.
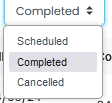
User will typically find options to filter appointments by their status, including:
- Completed: This will display appointments that have already taken place.
- Scheduled: This will display upcoming appointments that are still confirmed.
- Cancelled: This will display appointments that have been cancelled by the patient or the clinic.
- Filtering Appointments by Date in OPD Worklist
"Show Today" and "Show All" Buttons:
-In the systems, user see separate buttons for “Show Today” and “Show All” located on the OPD Worklist page.
-Clicking the “Show Today” button will filter the list to display appointments scheduled for the current date only.
-Clicking the “Show All” button will remove any date filter and display all your upcoming appointments, regardless of date.

Filtering Appointments
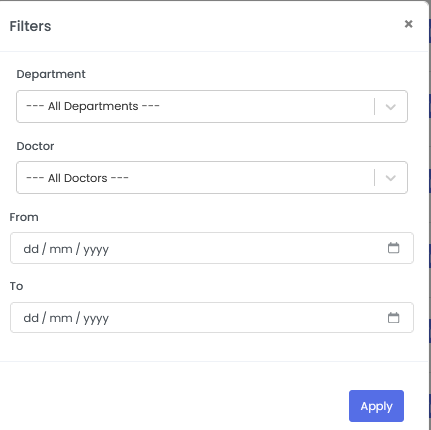
– Locate the Filters button on the OPD Worklist page. This button is represented by a “search icon”Clicking the Filters button will typically trigger a pop-up window to appear

Filtering Criteria in the Pop-Up
-The pop-up window will offer various filtering options to narrow down the appointment list. Here are some common filtering criteria user will encounter:
-Department: Select a specific department within the outpatient clinic (e.g., cardiology, pediatrics).
-Doctor: Choose a particular doctor from a dropdown menu or search bar based on their name.
-From & To Dates: Define a date range to display appointments scheduled between those specific dates.
Applying the Filters
- Within the pop-up window, select your desired options from the available filtering criteria (department, doctor, from & to dates).
- Once you’ve chosen your filters, click the Apply button located within the pop-up window.
Branch Selection using Authority Filter :
This feature allows the user to switch between appointments associated with different branches of the hospital.
Dropdown Menu : The “Authority” option appear as a dropdown menu listing the available hospital branches. Selecting a branch from this list will filter the OPD Worklist to display appointments specific to that chosen branch.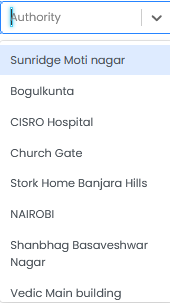
- User Options
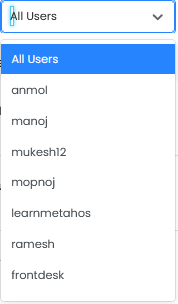
This option will be used to filter the worklist to display appointments assigned to specific users (e.g., a particular doctor).
This Filter display a list of all users with access to the OPD worklist.
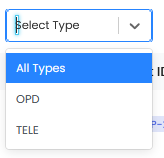
- Using the Select Type Option
This filter allow the user to narrow down the displayed appointments .
-Appointment type (All Types, OPD, TELE)
STEPS:
- Locate the Select Type filter on the OPD Worklist page.
- Click on the dropdown menu to view the available filter options.
- User typically find options to filter appointments by type, including:
- All Types: Displays all upcoming appointments.
- OPD: Displays only in-person outpatient clinic appointments.
- Tele: Displays only virtual telehealth appointments.
Searching Appointments in OPD Worklist
-The search bar or search field is located in right corner of the OPD Worklist page.
-The search bar is accompanied by a magnifying glass icon.
-Using the Search Function:
The search function allows the user to enter keywords or phrases to filter the displayed appointments. Here’s what user can typically search for:Patient Name: Enter the patient’s full name or a partial name to find appointments associated with that patient.
Appointment ID: If you have the Patient UHID no. or appointment ID, entering it in the search bar will directly locate that specific appointment.

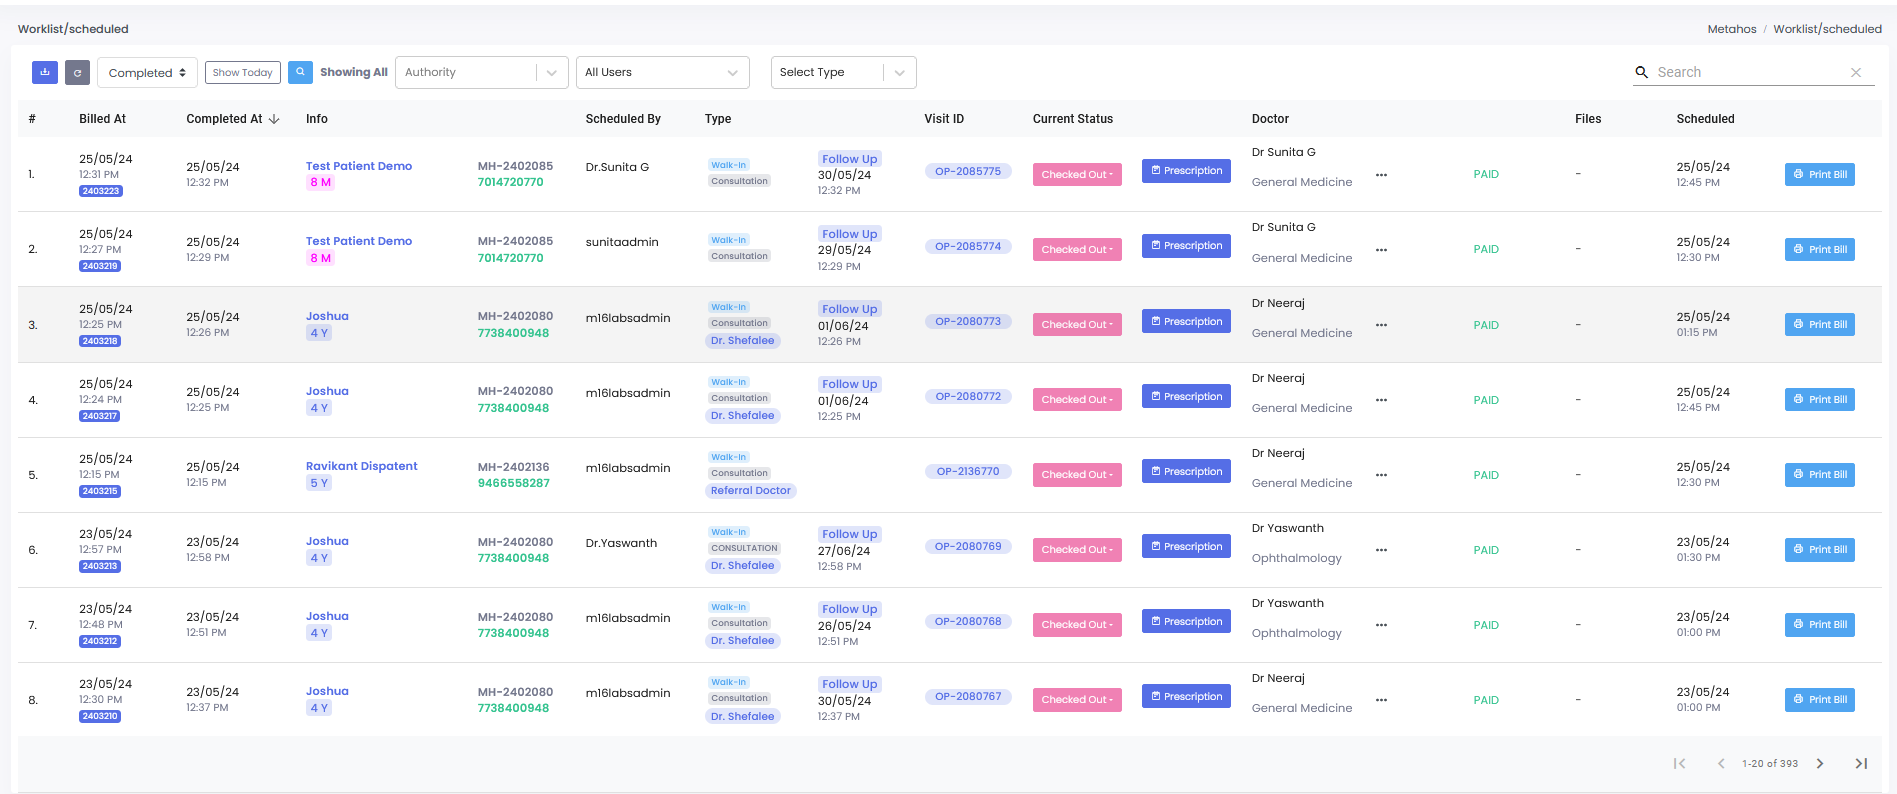
The " Billed At" column on the OPD Worklist displays the date each appointment was billed.
-This can be useful for tasks like:Reviewing Daily Billing Activity: Monitor billing activity for a particular day to ensure accuracy and completeness.
Identifying Unbilled Appointments: Potentially filter out appointments that have already occurred but haven’t yet been billed, highlighting any outstanding tasks.
Managing Insurance Claims: Focus on appointments billed to specific insurance companies within a particular date range for tasks related to claim submissions or tracking.

The "Completed At" column on the OPD Worklist displays the date each appointment was completed.

Information column containing patient details:
-Patient Name
-Age

This column contains a patient’s Unique Hospital Identification (UHID) number and phone number

Scheduled By column :The information displayed in this column typically includes the name or initials of the person who scheduled the appointment. It could be:
-A doctor: If the doctor themself directly scheduled the appointment for a patient.
-A nurse or clinic staff member: If they made the appointment on the patient’s behalf or based on doctor’s instructions.

Type: This column allows user to refine the appointment list based on
appointment types. It shows type of consultation and assigned Doctor name.

Appointment Type - This column represents the type of appointment, Consultation Date, Consultation Time.

Visit ID: Unique identifier assigned to this specific patient encounter within the EMR system.
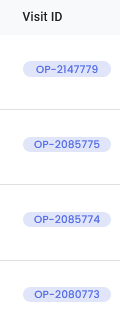
Current Status: Indicates the appointment’s current stage in the workflow (i.e. Upcoming, Checked In, Checked out).

Clicking “Assessments” opens a comprehensive fillable form for documenting patient evaluations.
-STEPS:
- Clicking “Assessments” opens a form.
- The form allows filling and various actions (Send, Fill (fillable form), Print, Upload and Response)

- This fillable form open as "Form List" , allows the user to enter the patient’s evaluation details, then utilize the buttons to Submit the completed assessment electronically.
-The form includes patient name, department, and assessment type.
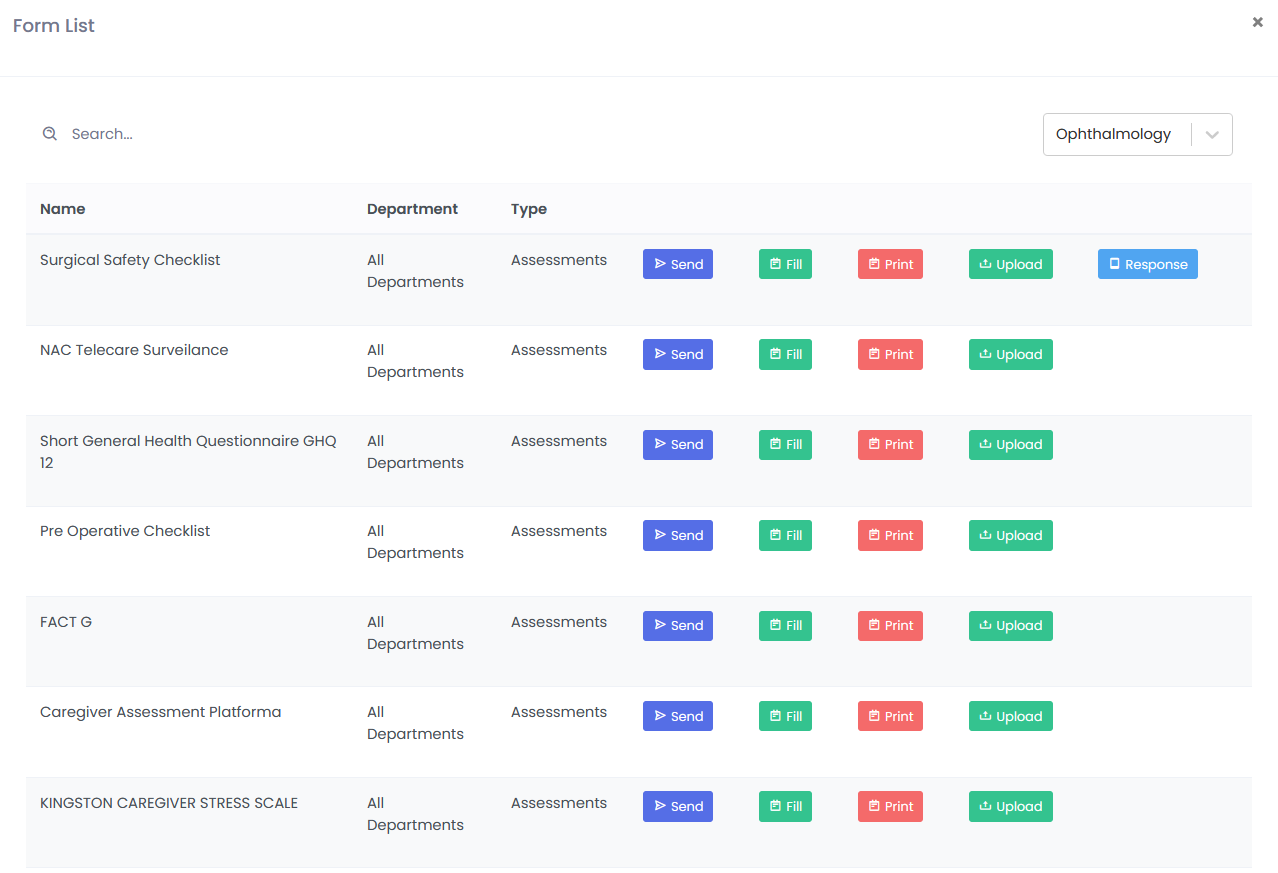
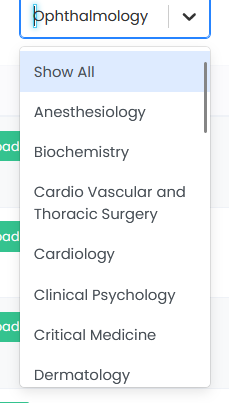
In the top right corner of the Form List , user can choose the relevant department from a dropdown menu, or select “Show All” to view all available assessment types.
This form includes options:
-To Send the completed assessment,
-Fill (Sign In, Time Out, Sign Out)
-Print a copy for the patient’s records,
-Upload relevant documents (e.g., labs, imaging results), and
-Response

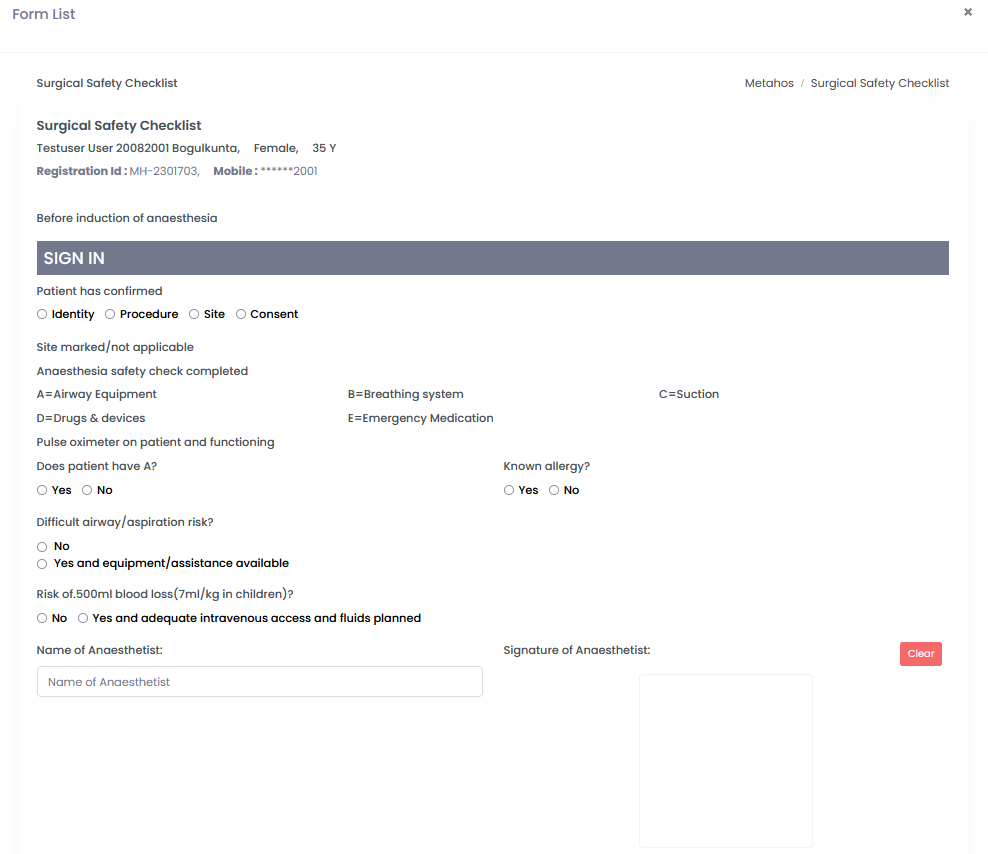
Click on the “Fill” , a form will open, containing a checklist.
-This checklist, crucial for ensuring patient safety.
Structure of the Checklist
The checklist is divided into three phases-
- Sign In
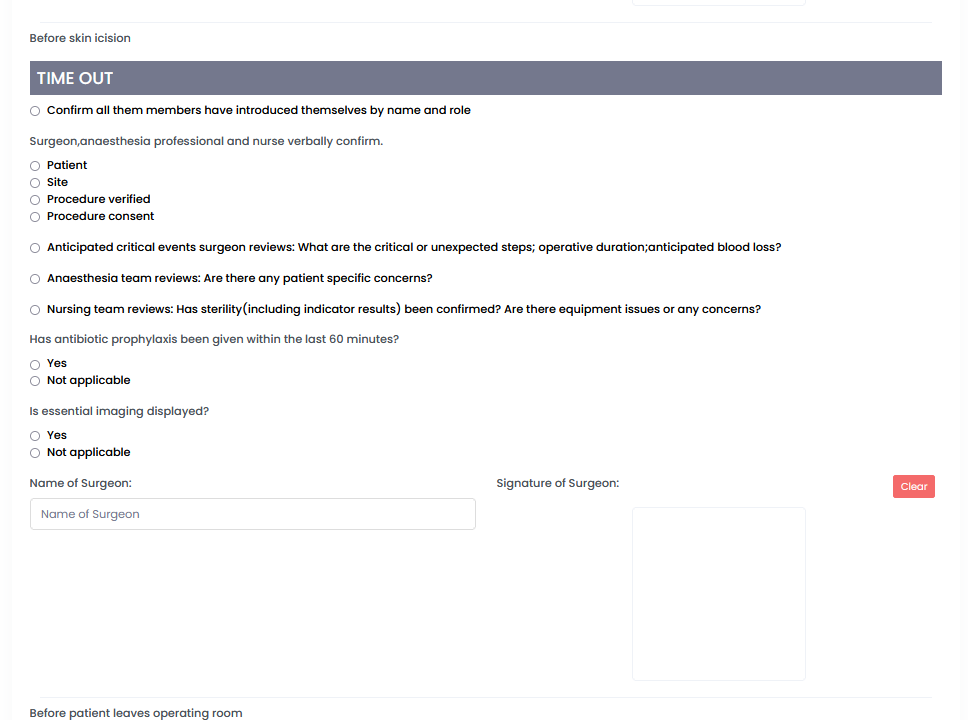
- Time Out
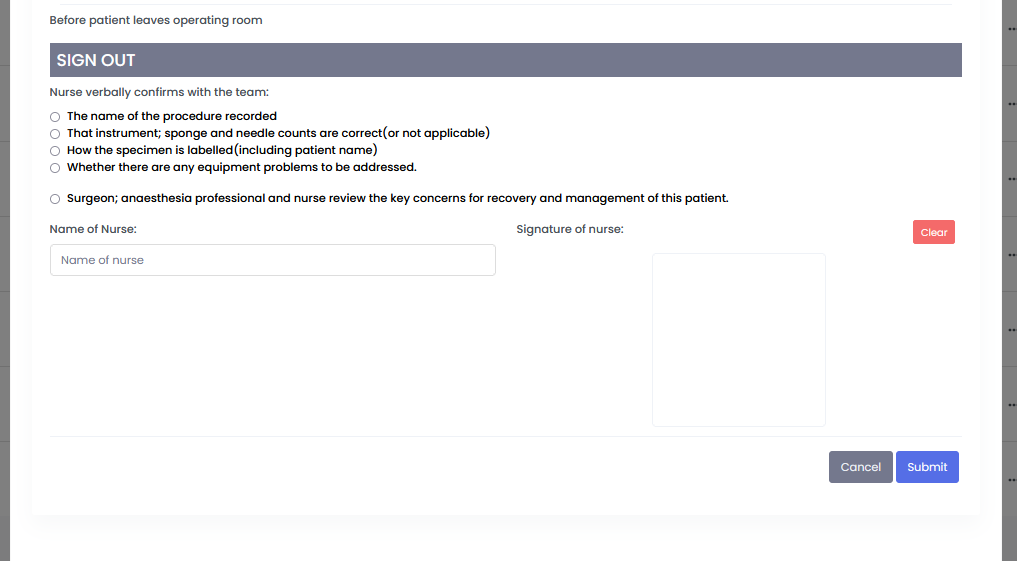
- Sign Out
- Sign In : This section verifies patient identity, procedure details, consent, and anesthesia readiness.
- Time Out: This section focuses on team communication, confirms critical details of the surgery, and ensures everyone involved is aware of potential risks and plans.
Sign Out : This section documents the completion of the surgery, any unexpected events, and post-surgical care plans.
Click on the Submit , once the form is filled.
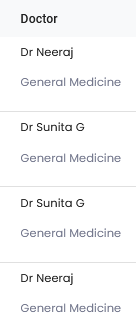
Doctor List with Departments
-Displays the doctor assigned to the Patient , also contain the name of the department.
The patient’s record displays buttons for “Edit/Refer” and “Vitals” -
-“Edit/Refer” offers functionalities for updating information, generating referrals, and adding notes.
-“Vitals” opens a dedicated section for managing vital signs.

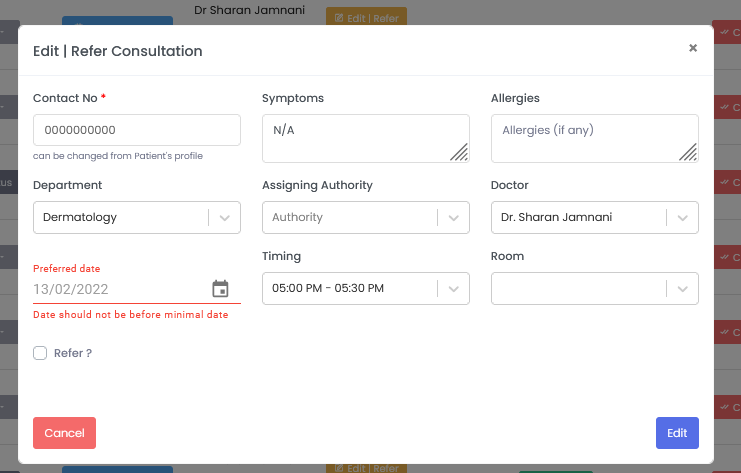
Clicking “Edit/Refer” opens a consultation form.
-The form allows editing various details:* Patient contact information
* Symptoms
* Allergies-Selecting referral department , assigning aauthority and potentially preferred doctor.
-Specifying preferred date, time, and room for the consultation.Highlighting the “Edit” function for modifying existing appointment details within the form.
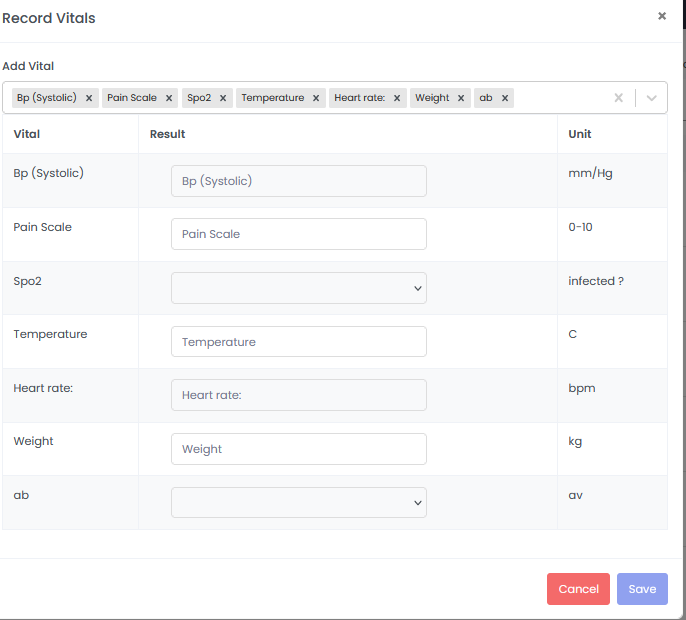
Clicking “Vitals” opens a dedicated section- Record Vitals.
-This section allows users to “Add Vitals”.
-When adding vitals, user can:1. Select the specific vital sign type.
2. Enter the measured result.
3. Choose the appropriate unit.-Click “Save” to record the vital sign measurement.
Clicking the " Three dots " opens a menu.
-The menu offers various actions for the selected patient.
-Button descriptions:* Call: Initiate a phone call.
* Files: Access medical records and files.
* Admit: Initiate patient admission
* Print Empty Rx: Print a blank prescription form.
* Upload: Upload documents to the patient’s record.
* Vaccination: Manage and record vaccinations.
* Cancel: Cancel Appointment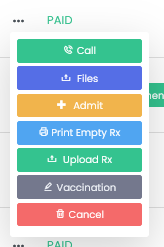
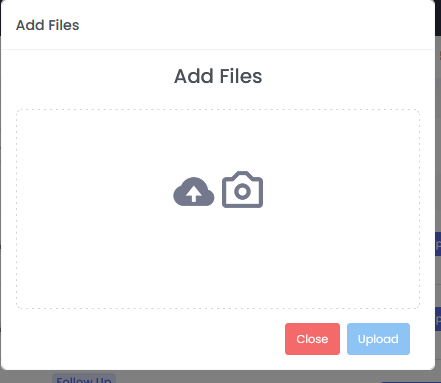
Files :Access the patient’s medical records and associated files.

Clicking “Files” opens a pop-up window.
-It offer functionalities for:
-“Add Files”: Select documents from your local device.
-“Upload”: Initiate the upload process for chosen files.
Admit : Initiate the patient admission process

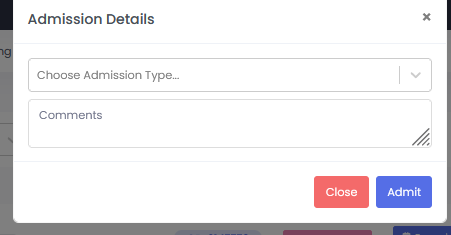
Clicking “+ Admit” opens a pop-up Form.
-The pop-up focuses on initiating patient admission.
-Users can:1. Choose the admission type (e.g., inpatient, observation).
2. Provide comments or notes in a dedicated field.Clicking “Admit” within the pop-up completes the admission process.
Print Empty Rx : Print a blank prescription form.

Upload Rx : Upload relevant documents (e.g., scans, reports) to the patient’s record.

Clicking “Upload Rx” opens a pop-up window.
-The pop-up focuses on uploading a prescription document.
-Users can:1. Browse and select the prescription file from their local device.
2. Clicking “Upload” within the pop-up initiates the upload process.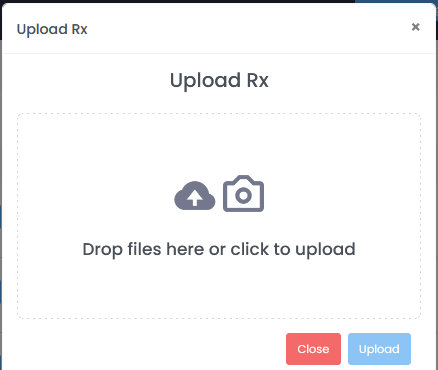
Vaccination: Manage and record patient vaccinations.

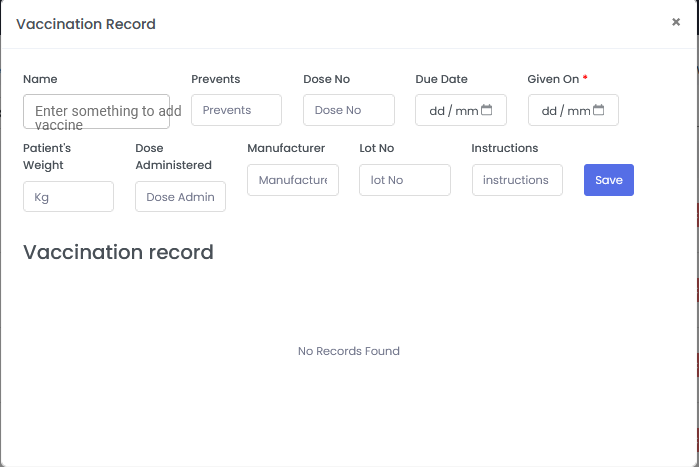
Clicking “Vaccination” opens a vaccination record form.
-The form allows recording and managing patient immunizations.
-Details you can enter include:* Vaccine name
* Prevented disease
* Dose number
* Due date for next dose
* Date administered
* Patient’s weight (if relevant)
* Dose type and amount
* Vaccine manufacturer
* Lot number
* Instructions-Clicking “Save” records the vaccination information in the patient’s EMR.
Cancel: Allows user to cancel the selected appointment.

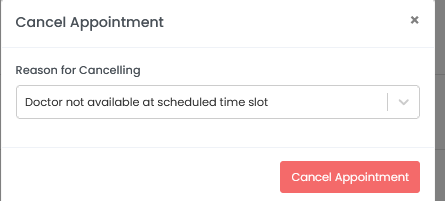
Clicking “Cancel” opens a pop-up window.
-The pop-up focuses on canceling the selected appointment.
-User need to:
-Enter a reason for cancellation.Clicking “Cancel Appointment” within the pop-up confirms the cancellation.
- Check a patient’s bill status (paid or unpaid) within the Patient Record section.
-The “Payment” button is associated with unpaid bills. - Clicking it initiates the online payment process.
- The specific process involve redirection to a secure payment portal or utilizing an integrated payment system within the software.
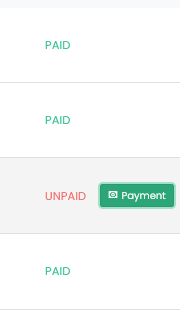
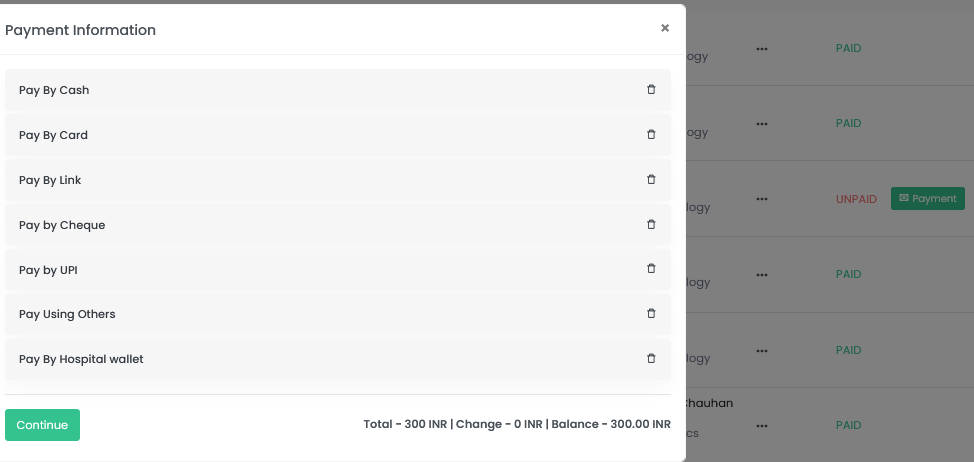
-Clicking “Payment” opens a secure payment information pop-up.
The pop-up offers various payment options:
  * Cash
  * Credit/debit card
  * Payment link
  * Check
  * UPI
* Hospital wallet-Users choose their preferred method and click “Continue”.
-Clicking “Continue” initiates the secure payment process within the software.
Cash: User enters the amount and clicks “Continue” for further instructions.
Cheque: User enters payment amount, cheque number, bank name, and IFSC code, followed by clicking “Save Cheque Details”.
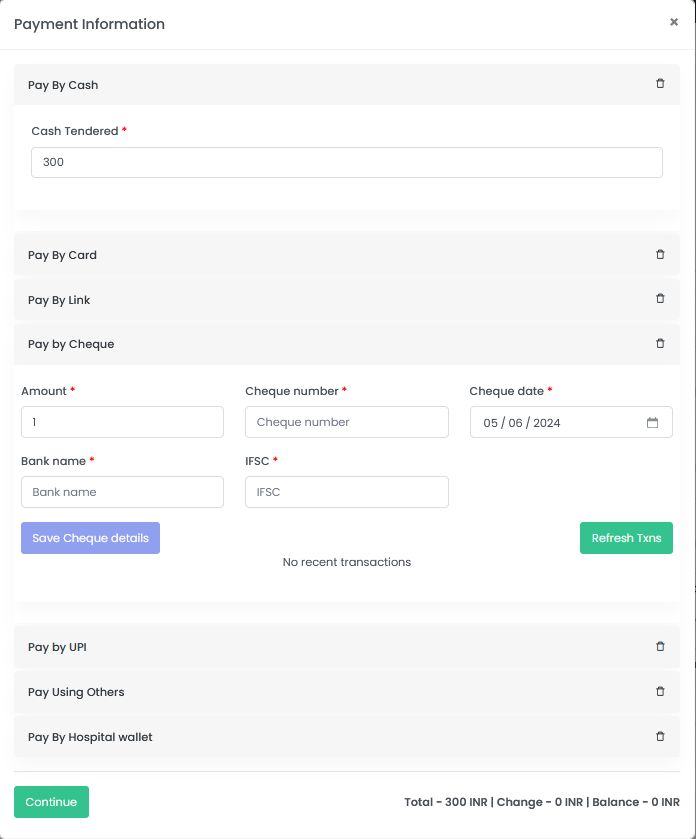
-Click “Continue” initiates the secure payment process within the software.

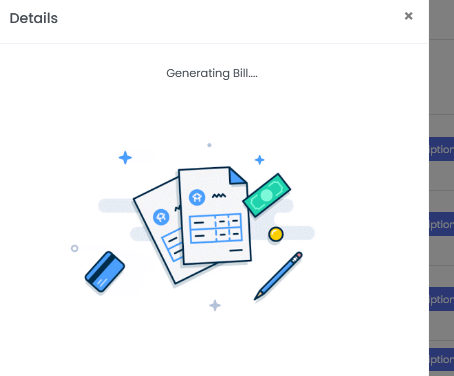
Clicking “Continue” will trigger a pop-up notification confirming bill creation as Generating Bills.
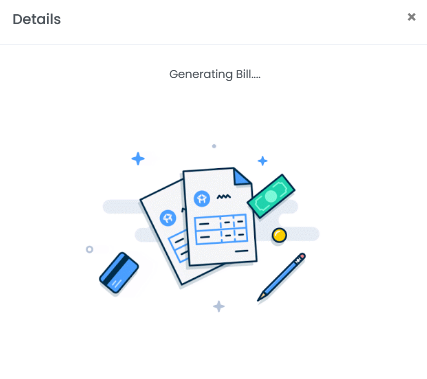
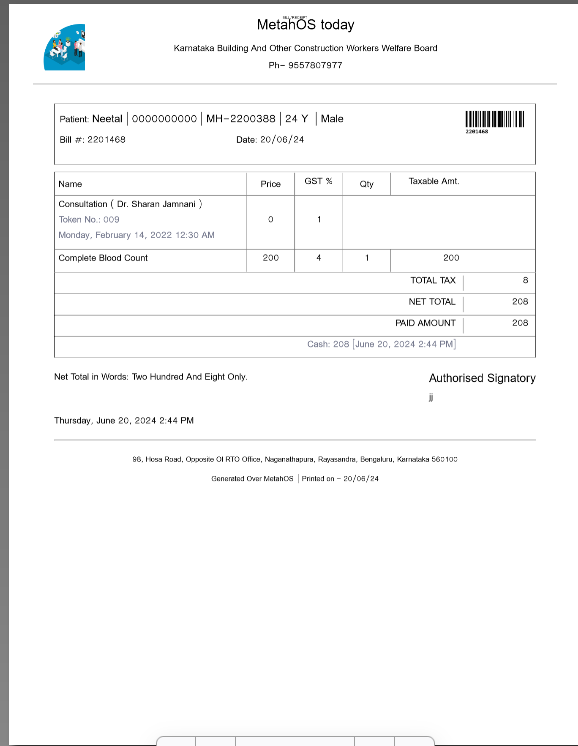
Bill will be generated in this format.
-The “Print” option will be available after initiating payment.
-Clicking “Print” generates a physical copy of the bill.
To initiate a Refund for a patient’s bill, locate the dedicated "Process Refund" button within the patient’s record section.
-Clicking this button will open a pop-up for processing the refund request.

Clicking “Process Refund” opens a new window for the refund request.
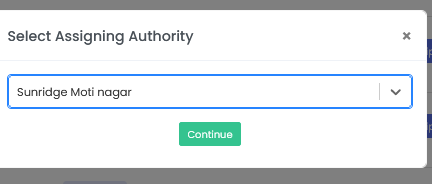
-This window require selecting the “Assigning Authority”.
-The assigning authority is likely someone authorized to approve refunds.Clicking “Continue” after selecting the authority moves for further steps.
The patient record section includes a column labeled “Files”.
-Clicking on a specific file name within the column opens the corresponding document associated with the patient’s medical record.
-This could be a report, scan, image, or any other relevant document uploaded to the patient’s electronic health record (EMR).

Previewing the File
-Clicking a file opens the document or preview.
-This preview window will display the patient file name and the document content.

Three potential options adisplayed below the file:
  * **Remove:** Delete the file from the patient’s EMR
  * **Download:** Save a copy to your device.
  * **Back:** Close the document/preview and return to the patient record.
The patient record section display a dedicated column- Complete.
-This column reflects the completion status of consultation.

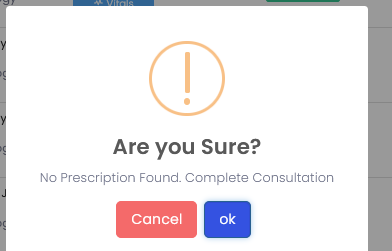
Click on the specific button label Complete , a pop -up window will come.
-To complete the consultation, click on OK.
To print the bill, locate the patient’s bill button within the patient’s record.

Clicking “Print Bill” initiates bill generation and provides instructions for printing after completion.
Bill will be generated in this format.
-The “Print” option will be available after initiating payment.
-Clicking “Print” generates a physical copy of the bill.

Navigating Lead Pages
-Look for the pagination controls in the lower right corner of the OPD worklist Frame
-An arrow pointing left ( “<” or similar) typically represents the “Previous Page” option.
-An arrow pointing right ( “>” or similar) typically represents the “Next Page” option.
